

How To Add Link To Another Blog On Tumblr
Are you trying to figure out how somebody put a link in their Tumblr description?
The process is actually quite simple, but it does require some extremely basic knowledge of HTML.
I'll also demonstrate how you can actually have a nice happy little menu that is mobile responsive, which only uses pure HTML and CSS. Note: Some of the other options I've seen are not that great and involve using iframes.
Note: The first part of this tutorial was designed for complete beginners and the second part is more advanced.
Step 1:
Go to the Tumblr Dashboard or click here.
Step 2:
Login to Tumblr.
Step 3:
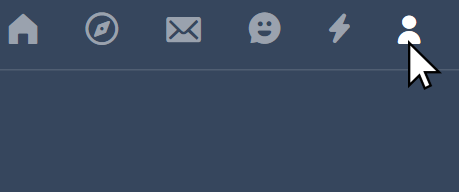
Click the Account Button, it should be in the top right-hand corner and looks like a small ball above half of a bigger ball. I believe that it's supposed to look like a person, but unfortunately, it doesn't.
Step 4:
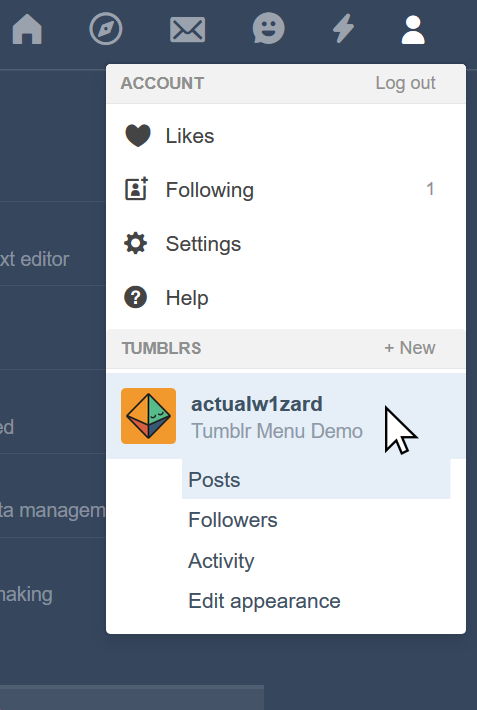
Select the Tumblr you want to edit in the case that you have multiple Tumblr blogs.
Note: I only have one Tumblr currently.
Step 5:
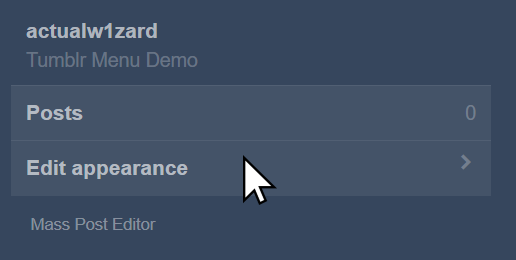
After selecting the Tumblr that you want to edit, Click the account button again and go to edit appearance. There are actually multiple ways to get there, and it doesn't really matter how you get to the edit appearance section.
Step 6:
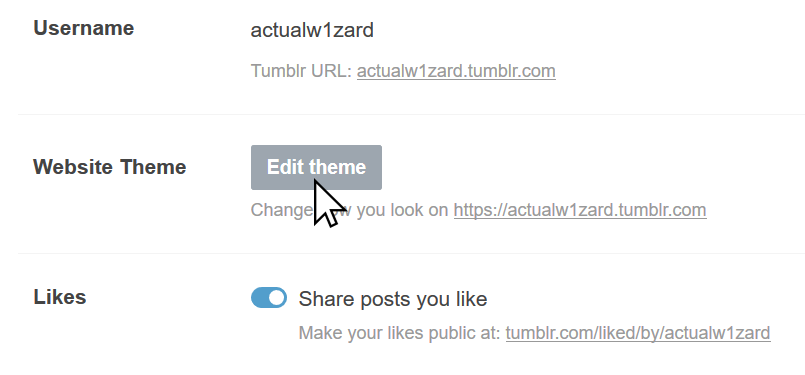
Click on the Edit Theme button.
Step 7:

Here's the part that might be slightly tricky for you:
To put links in your Tumblr description, you will have to be able to write some HTML code.
HTML code for links works as follows:
<a href="the URL">The visible text</a> Here is an example code for a functional link:
<a href="https://www.facebook.com/ActualWizard/">Follow Actual Wizard On Facebook!</a> So, that code will create a link, which links to my Facebook fan page and the text that is displayed will say "Follow Actual Wizard On Facebook!".
If you are not entirely sure how to format the URL, just go to the page that you want to link to, and then copy and paste the URL from your browser's address bar.
Tips:
All of the characters are important and are required, so if you forget a quotation mark or forget to close the tag correctly, the link will not work.
Usually, when I am working with small bits of HTML code, I actually write them in a notepad file. When I am pretty sure the code is correct, I select all of the code and copy it, and then paste it into where ever I am planning on putting it. This is obviously completely optional, but it helps if you are trying to write more complicated code.
Note: You can include more than one link if you wish.
Step 8:
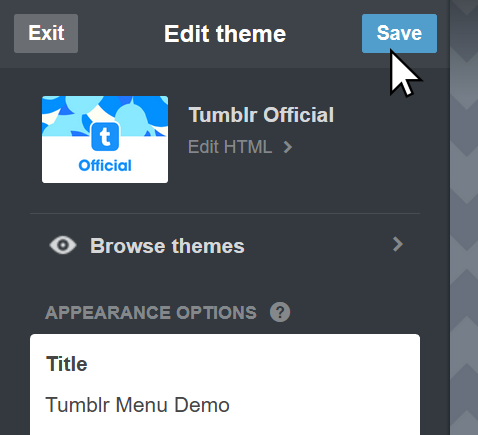
Press the save button!
Remember to Test your links!
How to Test Your Links and Be Sure They Work
Note: If you have enough experience to know what a normal link looks like, you can skip this.
I highly recommend that you do the following test. Some URLs contain information that helps keep track of whether you are logged in to a site or not. What you can do to double check this is to create a private browsing window in Firefox (or an incognito window in Chrome) then go to your Tumblr, and click the links in the private window. If you get an error message which usually says something along the lines of "your user session has expired" or you are required to log in, then that's probably not the URL you want to use.
To fix this, try to navigate to the page that you want to link to in the private window, when you get there, copy and use that URL instead. Usually the "bad URLs" contain a question mark in the address and include letters or numbers that look like gibberish.
Note: Most websites have moved away from tracking user sessions this way, but some older sites still do. If the URL seems relatively short and doesn't have a question mark, or a pound symbol (hashtag), then usually it's okay.
Warning: I was not able to personally reproduce this bug, but some people suggested that in some cases if you edit your Tumblr after saving the description, the link will disappear. For this reason, I recommend copying the code into a notepad file (TextEdit on Mac) and saving it somewhere in case this occurs.
Advanced: Turning your Tumblr Description into a simple responsive menu using CSS.
I just wanted to point out a few things before I get started since the tutorial is straightforward if you have any web design experience, but you can use this code and improve upon it to do some pretty cool things.
I used a clearfix to prevent the elements that are immediately following the menu from floating left, over to the right-hand side of the menu, outside the viewport. This is obviously not desirable, and the reason it occurs is actually pretty advanced. Without getting into a lengthy explanation of why that happens and how to work around it, I decided to go with the clearfix route since it should be much easier for beginners to work with. Just know that the CSS code that uses the :after pseudo-class is a clearfix and you probably need it depending on what you are doing.
Some would argue that this is not the best way to do this, but I honestly felt that it would be easier.
The next thing to understand is that Tumblr will automatically add <br> tags inside your description for each new line. So, to prevent those <br> tags from being injected into the middle of your HTML code, you need to keep all of your HTML on one line.
Since some people have reported losing their links after saving and editing their description, I highly recommend that you keep a backup copy of your HTML code in the case that this occurs. Personally, I fiddled with it and could not reproduce the problem, but it's better to be safe than sorry.
Tip: I highly discourage you from attempting to do any modifications to this code on a mobile phone.
If you can write CSS and HTML on a phone, good for you, most people will probably be to fumbling around with this for an hour.
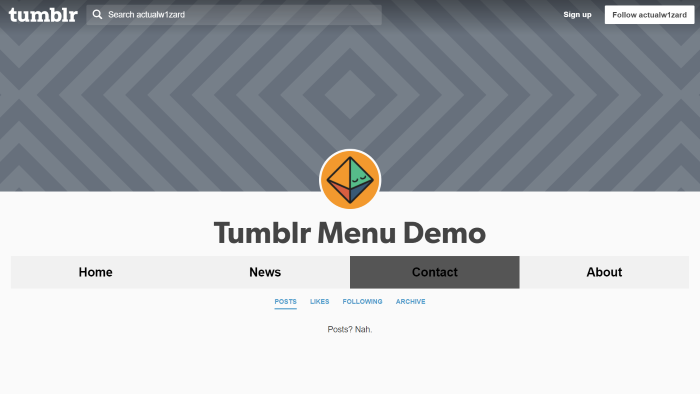
The HTML Code:
Paste this code directly into your Tumblr Description and edit the URLs and the anchor texts as you see fit.
<ul class="my-menu"> <li><a href="test1">Home</a></li> <li><a href="test2">News</a></li> <li><a href="test3">Contact</a></li> <li><a href="test4">About</a></li> </ul> Reminder: Edit out the unnecessary white-space and new line characters!
Adding The Custom CSS:
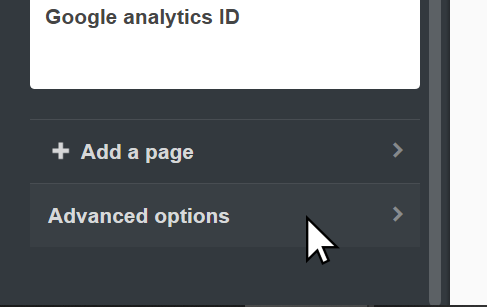
Go to the advanced section, by clicking Advanced Options, which is all the way at the bottom of the edit theme page. At the bottom of the advanced section, there is a section to Add Custom CSS. It's not a menu option, it's actually an editor box, and it's a little bit wonky as it doesn't appear to be a text box that you can put the code into.
Copy and paste this code into that section, no modification is required, but you will probably want to change the colors to match your theme.
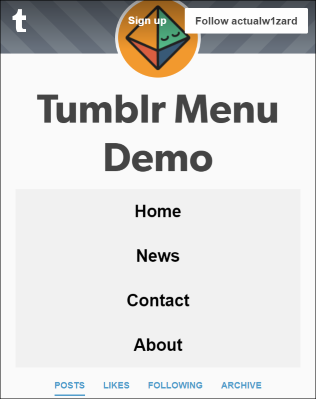
.my-menu li a { color: #000; padding: 8px 16px; text-decoration: none; font-size: 1.5em; font-weight:700; } .my-menu li { width: 25%; float:left; padding:14px 0px 14px 0px; background-color: #f1f1f1; } .my-menu { list-style-type: none; margin: 0; padding: 0; width: 100%; } .my-menu li:hover { background-color: #555; color: white; } .my-menu:after { content: ""; visibility: hidden; display: block; height: 0; clear: both; } @media only screen and (max-width: 480px) { .my-menu li { float:none; width:100%; } } Here is an image of what the menu looks like when viewed on a mobile device.
I hope you enjoyed this tutorial!
How To Add Link To Another Blog On Tumblr
Source: https://actualwizard.com/link-in-tumblr-description
Posted by: crawfordhaterreact1959.blogspot.com
0 Response to "How To Add Link To Another Blog On Tumblr"
Post a Comment